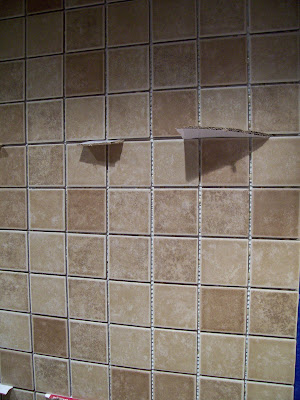
I kept thinking how good a tiled backsplash would look right under the range vent hood. Having tile just behind the stove would also help protect the wall from cooking splatters.
And now, a confession...
OK, OK! I misjudged the height of the cabinet and the range hood back when I did the wall repair, so there were some small, visible holes in the wall between stove and hood. I guess I was trying to save money and time by NOT repairing walls that would be hidden behind cabinets. Oops, I missed a spot. Besides, I ran out of patch anyway.
OK, FINE! I also didn't quite paint the wall high enough, then I ran out of paint. Really though, judging paint quantity within two square feet isn't so bad, right?
OK, let's skip the patching and the painting and the sanding and go with a tiled backsplash.
And guess who has done a little tile work and was just dying to add a backsplash to his portfolio?
Redneck Friend!
After taking exact measurements we started by adding a little shim that would act as a stop or a guide to build up from.
Then we taped the area off with painter's tape and scored the wall so the adhesive would hold better.
Then, Redneck Friend used a special tile trowel to spread the adhesive around.
We had a blast doing this, and the jokes were getting out of hand!
"Looking good, Redneck Friend! Oh, and so is the adhesive! Oooooh!"
Redneck Friend almost got a sunburn from the halogens on my vent hood, but we managed to finish up the adhesive without any sunscreen.
The tile that Wife and I liked the most happened to also be the cheapest tile they had at the nationally-recognized home-improvement megastore. We got 2-inch tiles that were stuck together in 12-inch sheets with little squirts of silicone, or something. Two and a half sheets fit across just fine with no tile cutting!
I'm not going to lie: watching Redneck Friend do the tile was super easy! Everything was really coming together.
Redneck Friend: "Man, that's as awesome as... uh..."
Me: "Your mom? Oooooh!"
We didn't have any real tile spacers, so we improvised with little pieces of cardboard.
After the adhesive dried (a day or two), we started with the grout. For a job this small, I went ahead and bought the pre-mixed tile grout. It's a little more expensive, but it comes in small quantities and it already mixed to perfection.
This cool grout sponge wiped away the excess. The sponge looked a little like a big piece of cornbread.
Mmmm. Cornbread. Maybe when this kitchen is done I should blog about food. Mmmmm.
Oh yeah, tile.
As you can see from this photo, Redneck Friend is both awesome and taken.
Sorry ladies.
I finished the job with a carefully shaped bead of grout caulk where the painter's tape was. It was like gritty silicone and it helped blend in the edge of the tile with the wall.
After a job well done I fed Redneck Friend all my food and sent him home to the country.
"I'm gonna stick a fork in you, backsplash! Cuz you're done! Ooooh!"
Nevermind.


Have you ever had my cornbread?.....I make a mean cornbread...much better that a grout sponge.
ReplyDelete